Monday, February 23, 2015

Thursday, April 17, 2014

First SkinTastic Video

Renae Christine at Rich Mom Business motivated me to make a product video. I wanted to be part of her new, exciting project. That's all I can say, but if you want to know more, here her big plan revealed.


I happened to have my Cotton Candy Lotion ready to photograph. It had taken some preparation, because I wanted some pink cotton candy for the videos. But with three hungry teenage boys here, even if I got ahold of cotton candy it would never last long enough to get my pictures. So I dyed some stuffing pink. Can you tell?


And then then I used Renae Christine's suggestions to make a video. I ended up using different tools though. I used the video on my Samsung Galaxy 3 for the the video and then added sound and pieced it together on Windows Live Movie Maker and converted it to an mp4 for viewing. Here it is.


Does that look like cotton candy?


Monday, March 31, 2014

SkinTastic Giveaway Winners

We have winners!

Michelle L. won the Awapuhi lotion and soap set.

Sarah T. won the Pixie Dust Soap

Alison R. won the Patchouly Soap

Beth R. won the Sunflower Soap

Holly E. won the Vanilla Lip Balm

Amber G. won the Cucumber Melon Lip Balm

Twas fun! Watch for more SkinTastic Promotions. If you want to be sure you aren't missing anything, subscribe to the newsletter. http://www.skintasticcreations.com/mailinglist.asp


Thursday, March 27, 2014

Soapmaking Classes

For years I've been teaching people to make soap.

I've created handcrafted soap for over fifteen years, and there is such a fascination with that. Even people who don't want to learn to make soap are curious about the process. When people ask "How do you make it?" or "What's in it?" I struggle to come up with a quick answer. It's more involved than a ten second answer. Of course I usually say something about it being made of vegetable oils, water and lye. It's a general answer, but sometimes all they want to know.

Of course I would like to tell them about the properties of coconut oil and how it creates a big bubble lather. Or about combining it with oils like palm and olive to create the perfect hardness and mild conditioning properties. But mostly I want them to understand that I superfat with something cool like avocado oil to make it the perfect bar of soap that won't be drying to your skin. And there is so much more I want to tell them. But I have ten seconds.

However, some people really do want to know more. They want to get their hands on the oils and understand the process.Because of these requests and my love of teaching, I've decided to make my classes a more regular option.

The first one is scheduled for April 12. I've also scheduled a lotion making class on May 10.

If you are one of those people who is interested in understanding the process, and you are close enough to get here, I invite you to join us.

Read more about it on our website.

http://www.skintasticcreations.com/classes.htm

Tuesday, March 25, 2014

Lotion Making Day


I have seven new varieties of lotion on my SkinTastic shelf. Here you see the seven batches at the cooling phase. At this point I am stirring and using the stick blender to work them into that perfect consistency as the emulsion sets and becomes stable.

What are the new fragances?

Drumroll please...

Red Roses

Juniper Breeze

Cotton Candy

Ocean Breeze

Huckleberry

Moonlight Path

Pear

My husband and kids all have their favorite of the new batches. My sixteen year old son loves the Red Roses and Pear. My seventeen year old son likes the Juniper Breeze and my husband always loves Huckleberry.

Which is my favorite?

Oh! That is so hard. Kind of like choosing a favorite child, which my children always try to get me to do, but I never could. The Cotton Candy is fun. The Red Roses really do smell like roses. And the Moonlight path is surprisingly sensual and soft. But if I absolutely had to start choosing favorites, I might be able to narrow it down to Juniper Breeze, Huckleberry and Pear.

Which one would you love to try?

Saturday, March 15, 2014

Growing Calendula

Calendula easy to grow. Here you see my calendula already starting to grow on its own. It's located in a warm spot on the south side of my house and tends to show up with my early blooming daffodils. However I'm starting more inside also. This gives it a warm start and gets it going more quickly.


To do this I mix half peat moss and half perlite for my soil. It is spread into my growing tray. Sometimes I fill the tray all the way and then poke holes where I'm dropping the seeds. However, this time I only filled it most of the way and then sprinkled the seeds on top. Then I covered it with a thin layer of soil.


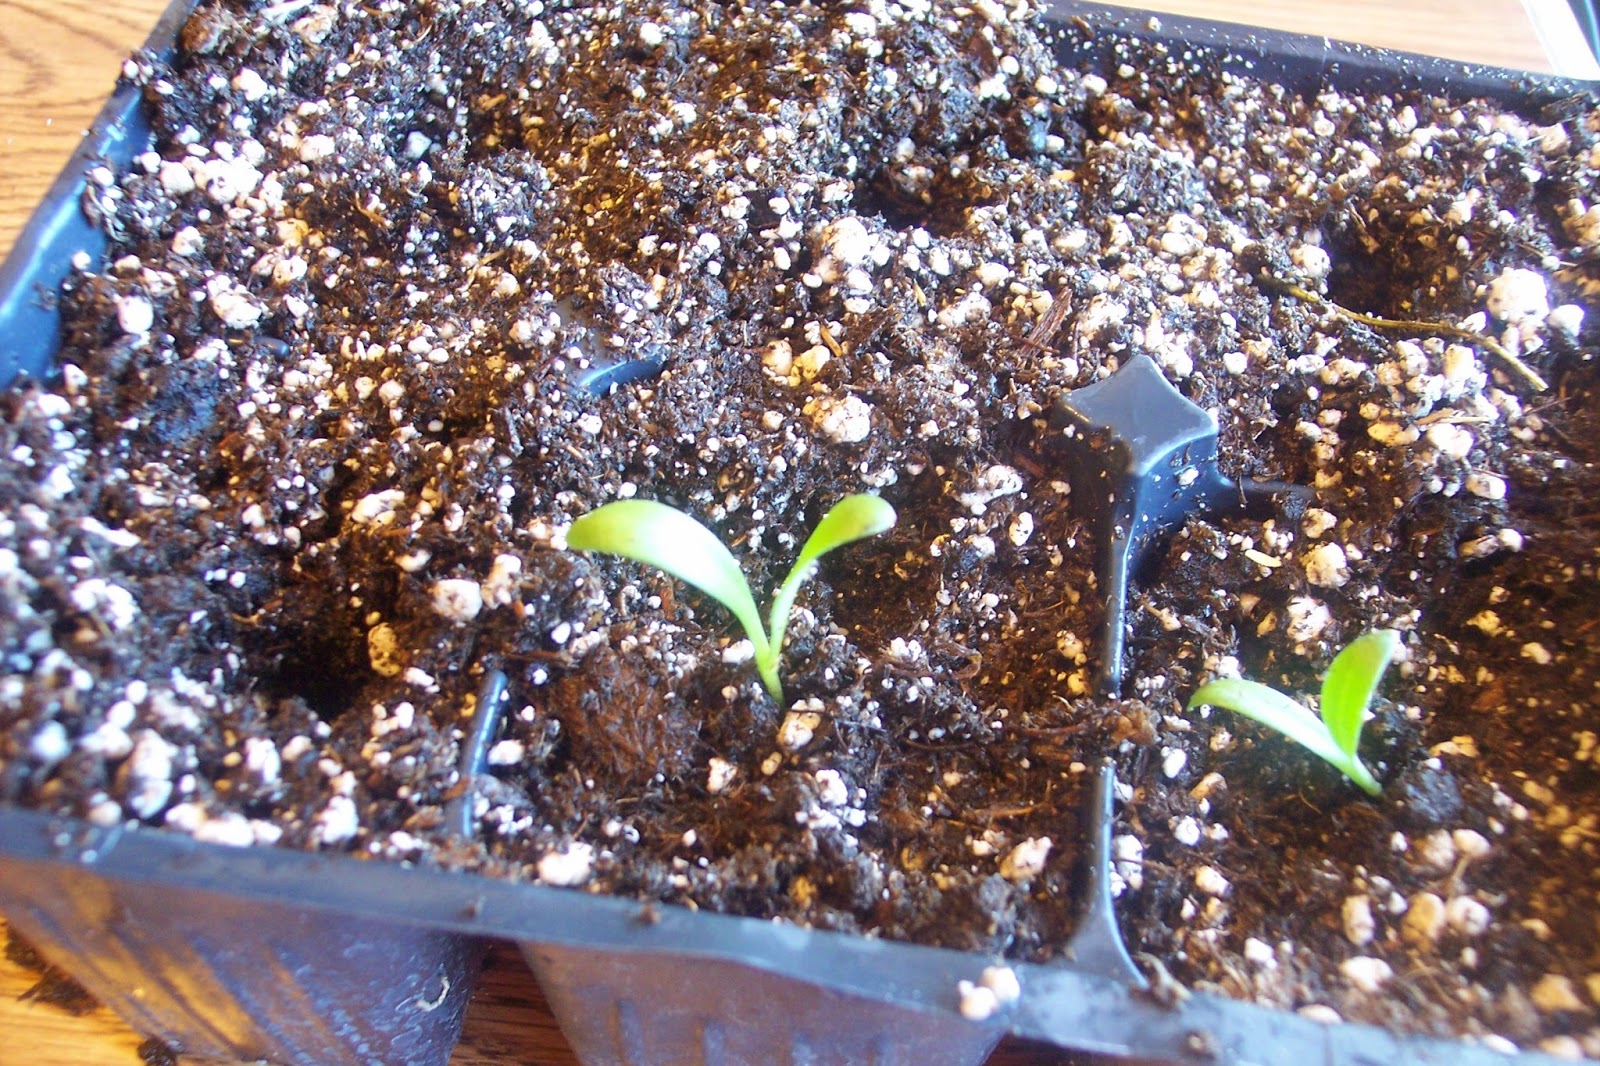
The great thing about calendula is that it starts growing quickly. This is less than two weeks growth. They are ready to separate.

To separate the seedlings, remove them from their tray and gently pull the plants apart.

Prepare the new tray with soil. Make sure it is moist, but not too wet. Poke holes in the spots you are transplanting and insert the seedling. Plant it deep enough that most of the stem is underground. Press the soil gently around each plant and water.

Make sure your plants have enough water and sunlight every day. If the stems seem like they are getting too long, the plants need more light.

By fall these seedlings will have produced the flowers that will be made into and herbal balm.


Friday, March 14, 2014

Collecting Calendula Seeds

You don't have to buy new calendula seeds every year. Collecting them from your existing plant is fun and easy. It's almost as easy a harvesting the flowers, but you wait a little longer before you pick them.

As the bright yellow and orange calendula blooms start drying up and fading out, watch for the seeds to mature at the base of the petals. At first the seeds will be green. For best results you want to leave them on the plant until the seeds turn brown. Then pick the dried up flower from the plant.


The seeds will almost fall off into your hand. If not, rotate them between your fingers to encourage the seeds to pull away from the base. Collect these and save for next year. Or sometimes I just sprinkle them back into the garden. They may not do as well this way as if you grow them inside in the spring, but many of them will grow.

Propagating new herb plants can be fun.

Some other great herbs to collect seeds from are basil, fennel, parsley, mullien, chamomile and dill.

Have you collected any of these? Or any others?